We use cookies to make your experience better. To comply with the new e-Privacy directive, we need to ask for your consent to set the cookies. Learn more.
Part 7: Proceed with caution
October 07, 2007

Have you ever had that feeling that you were forgetting something? That thought at the edge of your mind that you just can’t seem to bring into focus?
Well, I had two realizations recently.
First, Sema is right around the corner.
Second, that means that I am really behind on updating the progress of our Project Car.
Up to this point, what we have done is basically make the most of what Subaru gave us to begin with. Subaru does lots of research and testing before releasing their cars for us to buy. What we have done is to tweak the car a little here and there to realize overall better performance. We have definitely improved things a lot, however, if we want to go further, that means that we are going to have to cast away many of the key stock components and replace them with something else.
So since we are going to be making some big changes, we need to make sure that we do our homework so that we can actually improve upon what Subaru gave us, rather than make things worse. Basically, we need to proceed with caution.
So before we move forward, we need to look at what we have done, and decide how best to further improve upon that foundation. This might sound easy, but it can be deceiving. Basically what we need to do here is to decide what we want our car to do, and then decide what kinds of compromises we are willing to make to get it there.
In other words, it is great to set your car up for a specific purpose, like road racing for instance. But then driving your car to work every day may end up being a lot less fun. Not to mention you might end up burning through a set of tires every couple thousand miles, which would not be much fun. Or maybe it would. We will have to make that choice.
To begin with, we’ll take a broad look at some of the things that we might want to change, and then we’ll come back in further chapters and go in depth in regards to the choices that we made and why.
First, we need more power!
Thankfully we picked a turbo-charged car to begin with, so all we have to do here is turn up the boost. More boost means more power, right?
Nope.
Well, sort of, but it isn’t that simple.
One of the most important things to understand about a turbocharger is that it has a pressure/RPM range where they produce the most pressure, while adding the least heat. This is what a compressor map shows if you are able to find one for your turbo. In other words, if you were to graph a turbo’s efficiency, it would not be a straight line, it would actually look something like a bell curve.
The idea here is that there is a point where a turbo can make more pressure, but it does so less efficiently (so it is heating up the air more), so there is less power potential, and if you ask the turbo to make even more pressure, the power potential goes down even more. It is possible, for instance, that your car will make the same amount of power at 18 psi. as it does at 15 psi. because they are both in roughly the same location, but on opposite sides of the ideal pressure for the turbo.
This can be a hard idea to grasp, so let’s simplify things. If you have two containers pressurized to 10 psi., but one is at 70* F, and the other is at 140* F, the air in the cooler container will be more dense (and have more oxygen) than the container at 140* F.
If you are thinking this sounds a lot like how a hot air balloon works, you are on the right track.
The other very important thing to understand is that when Subaru picked the Turbocharger, Intercooler, and Fueling system for this car, they knew all this, and made sure that they could all work together. The TD04 turbo was picked because it matches the flow rate of the 2.0 liter engine with the boost that they specified, and they picked an intercooler that would be able to cool down the intake charge sufficiently, and they picked a fuel system that is capable of delivering enough fuel for the air that is being sent to the engine.
Something interesting to note is that in 2006, when Subaru went to the 2.5 liter motor for the WRX, they kept the same turbo. Because that motor had a higher flow, the turbo was pushed out of its efficiency range sooner, so it ran less boost from the factory, but still made roughly the same power. The big difference comes when you start to turn up the boost. Where there is a reasonable amount of room to increase boost pressure and still make power with the 2.0 liter WRX, the 2.5 liter WRX is all ready pretty close to the limit of what the TD04 can do. This is one of the reasons for the difference in power increase between the two cars if you were to look at the Cobb Stage 1 and Stage 2 maps.
So what does all of this mean? Well, if we want to make a lot more power, and who doesn’t, we need a turbo that can make the same, or more boost pressure more efficiently. In other words, we need a bigger turbo. We also need to pick our intercooler and fuel system so that they can support the amount of air that we will be sending to the engine. We could pick one single area to improve, but if we do, more than likely the gains that we could make would be limited by the other two, so we need to take a balanced approach here.
One other thing that I will mention has to do with the fuel pump. What ever injectors we decide to go with, it is a good idea to switch out the factory part with a high-flow aftermarket alternative. This will ensure that we have an adequate amount of fuel going to our larger injectors. You probably don’t absolutely have to do this, but fuel pumps are cheap insurance. Something else I will mention is that just installing a fuel pump by itself will not increase the amount of fuel that is getting into the cylinder because there is a fuel pressure regulator that makes sure that the fuel pressure heading to the injectors is consistent, so you have to replace both.
Stopping is important too.
I said before that the one thing that was borderline inadequate on the stock WRX was the brakes. We have turned up the wick a little, and have up-graded our pads, but if we are going to take things even further, more than likely we’ll have to do something more drastic with the brakes.
This is actually really important because no matter where you are driving, street or track, if your brakes fail, bad things almost always happen.
Fortunately there are a lot of options out there, and they don’t necessarily require a high dollar big brake kit. Believe it or not, in some cases a big brake kit can actually increase your stopping distance. This is because if you dramatically improve the stopping ability of your front wheels, and don’t do anything for your rear wheels, your brake bias can be shifted so far to the front that the front wheels will be doing all the work, and the rear’s will just be along for the ride, so you aren’t able to make full use of the car’s traction to haul everything to a stop.
That being said, what a big brake kit does offer is a much better ability to dissipate heat. So even though your stopping distance may be a little longer, it will be consistent time and time again, where as a stock brake system would succumb to heat and fail much sooner, dramatically increasing stopping distance.
If we weren’t going to go with a big brake kit though, we can still dramatically improve the car’s stopping ability by using a more aggressive brake pad. This is an option that is often overlooked, and there are now a wide range of pads available that have a higher operating temperature with a more aggressive friction compound. You can actually get close to the same performance with a upgraded pad to what you could get with a big brake kit (you still have to keep bias in mind and look at both front and rear), but there are two things to consider.
First is that many more aggressive pads have a higher minimum operating temperature, so you actually have to heat them up a bit before they work. This means that they are really something you should only use at the track. The other thing is that they are able to generate a dramatic improvement in stopping because they have a much more aggressive friction compound. Think of this as a rougher gauge of sand paper compared to the less aggressive pad. This means that they will wear out your rotors a lot faster the more aggressive of a compound you pick. Using Cryo-Treated rotors will help minimize this, however when used sparingly, this is a very good alternative to a big brake kit.
What about tires?
I probably should have mentioned tires earlier. In an All Wheel Drive car, you usually have plenty of traction for acceleration, but good tires are essential when it comes to braking and cornering speed. Your tires are the only four points where your car is actually in contact with the road, but it is amazing how easy it is to forget them.
I am currently of the opinion that a good summer tire is best if you really want a good performing tire. The problem with all seasons is that they are designed for all conditions, so the tread design is usually a little too knobby, and the compound leaves too much on the table in terms of summer performance to try to get good traction in the cold and snow.
We might as well mention wheels here as well. A slightly larger wheel that will allow you to run a wider tire can also be a big help. You just have to make sure that you get a wheel that will work properly with your car. For instance, a 7.5" wheel is about as wide as you can go on a WRX wagon, where as you can fit an 8" wide wheel on a sedan because they have fender flares. Also, don’t get too greedy when it comes to tire width. Sure, wider is better, bit if you are rubbing, it can be a real headache.
Oh, and when it comes to wheels, don’t forget to think about weight. A bigger wheel typically weighs more than a smaller one. But if you don’t check the weight of a wheel before you buy it, you could be in for an unpleasant surprise. You definitely want the lightest wheel in the size that you want because it will help to reduce un-sprung weight, and you will have less rotational inertia to overcome to get the wheel to accelerate, or decelerate. So a light wheel can have a positive affect on all aspects of your cars performance. Just make sure that the lightweight wheel you pick hasn’t sacrificed strength to shed the weight.
So what’s left and/or right?
This brings us to suspension. Well, up to this point, all we have talked about is sway-bars. And I haven’t really discussed those yet. This stuff gets pretty complicated, but I think that I am just about ready to really get into some of this. But not right now…
What I will tell you is that I am just about happy with what we have done to the car, and it took a couple of trips to the track to play with some things to get everything dialed in.
For now, I’ll just touch on some of the things to consider. I still feel that sway-bars are a perfect place to start. I still have the Whiteline 22mm bars on front and rear. I have just moved the rear up to the medium setting. Then there are springs or coilovers, upgrading bushings, and maybe a little chassis bracing. Okay, a lot of chassis bracing. Oh, and alignment.
I have to confess that I have become a corner junky. If you think about it, if you have your car set up so that you can carry a lot of speed into, and through, a turn, all of a sudden braking and acceleration become less important. All you need brakes for is to slow the car down to your corner entry speed, and then once you come out of the corner, accelerate down the straight, and repeat. Simple really.
Versatility is the key here. Having the ability to change settings so you can get the car dialed in, versus being stuck with some of the factory settings, makes a huge difference. Having a knowledgeable person to point you in the right direction doesn’t hurt either. This is why I am now a big fan of coilover suspension over springs, you just have to make sure that you pick a well designed set, and get the set up correctly.
Well, that is the direction that we are heading. Rest assured that we haven’t stopped working on the car. Actually, we are just getting started, and now things are getting interesting. And with any luck, the next entry won’t take me nearly as long to write.
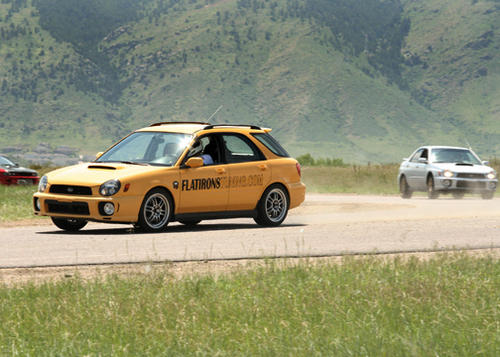
Picture by Jenny Orin